解决 electron builder 系统托盘出现多个图标的问题
问题描述:
Windows10 中 electron builder 打包的应用,覆盖安装的时候出现多个图标,鼠标 hover 上去就消失
![]()
![]()
复现步骤:
Windows 10 操作系统下
- 打开你的应用
- 双击安装包
- 正常安装
- 安装完成后查看系统托盘
- 此时会出现多个图标
解决:
原理:
在安装完成的时候,模拟人的行为去点击系统托盘
步骤:
- 创建 installer.nsh,在 customInstall 宏中写入下面代码
txt
!macro customHeader
  !system "echo '' > ${BUILD_RESOURCES_DIR}/customHeader"
!macroend

!macro preInit
  ; This macro is inserted at the beginning of the NSIS .OnInit callback
  !system "echo '' > ${BUILD_RESOURCES_DIR}/preInit"
!macroend

!macro customInit
  !system "echo '' > ${BUILD_RESOURCES_DIR}/customInit"
!macroend

!macro customInstall
  !system "echo '' > ${BUILD_RESOURCES_DIR}/customInstall"
  ; typedef struct _RECT {
  ;   LONG left;
  ;   LONG top;
  ;   LONG right;
  ;   LONG bottom;
  ; } RECT, *PRECT;
  !define stRECT "(i, i, i, i) p"
  ; $0: SysTray Window Handle
  FindWindow $0 "Shell_TrayWnd" ""
  FindWindow $0 "TrayNotifyWnd" "" $0

  ; ; 找到折叠图标的箭头句柄
  ; FindWindow $1 "Button" "" $0

  ; ; 如果找到了这个箭头按钮,模拟点击它
  ; IntCmp $1 0 noArrow
  ; SendMessage $1 ${BM_CLICK} 0 0
  ; Sleep 100 ; 给一些时间让菜单展开

  ; noArrow:

  FindWindow $0 "SysPager" "" $0
  FindWindow $0 "ToolbarWindow32" "" $0

  ; Create RECT struct
  System::Call "*${stRECT} .r1"
  ; Get windows information
  System::Call "User32::GetWindowRect(i, i) i (i r0, r1) .r2"
  ; Get left/top/right/bottom coords
  ; $2: Left, $3: Top, $4: Right, $5: Bottom
  System::Call "*$1${stRECT} (.r2, .r3, .r4, .r5)"
  System::Free $1

  ; $2: Width
  IntOp $2 $4 - $2
  ; $3: Height
  IntOp $3 $5 - $3

  ; $4: Small Icon Width
  System::Call 'User32::GetSystemMetrics(i 49) i .r4'
  ; $5: Small Icon Height
  System::Call 'User32::GetSystemMetrics(i 50) i .r5'

  ; $7: y - Start at the bottom
  IntOp $7 $4 / 2
  IntOp $7 $3 - $7
  LoopY:
    ; $6: X - Start at the right
    IntOp $6 $5 / 2
    IntOp $6 $2 - $6
    LoopX:
      SendMessage $0 ${WM_MOUSEMOVE} 0 "$6 | $7"
      IntOp $6 $6 - $4
      IntCmp $6 0 EndLoopX EndLoopX LoopX
    EndLoopX:
    IntOp $7 $7 - $5
    IntCmp $7 0 EndLoopY EndLoopY LoopY
  EndLoopY:
  ; 先找到 NotifyIconOverflowWindow 句柄

  FindWindow $0 "NotifyIconOverflowWindow" ""
  FindWindow $1 "ToolbarWindow32" "" $0


  System::Call 'USER32::IsWindowVisible(i) i ($0) .r0'
  IntCmp $0 0 makeVisible 0

  makeVisible:
    ; SW_RESTORE 值为 9,它将窗口还原,并根据窗口之前的状态,激活或取消激活。
    System::Call 'USER32::ShowWindow(i, i) i ($0, 9)'

  ; 把$1 赋值给 $0
  StrCpy $0 $1
  ; 创建 RECT 结构来存储窗口的位置和大小信息
  System::Call "*${stRECT} .r1"
  System::Call "User32::GetWindowRect(i, i) i (i r0, r1) .r2"
  System::Call "*$1${stRECT} (.r2, .r3, .r4, .r5)"
  System::Free $1

  ; $2: Width
  IntOp $2 $4 - $2
  ; $3: Height
  IntOp $3 $5 - $3

  ; MessageBox MB_OK "Width: $2, Height: $3"

  ; 如果宽度或高度小于1像素,直接结束
  IntCmp $2 1 0 EndOverflowLoopY
  IntCmp $3 1 0 EndOverflowLoopY

  ; 设定最大的循环次数
  StrCpy $8 20   ; X方向的最大循环次数
  StrCpy $9 20   ; Y方向的最大循环次数

  StrCpy $7 3   ; <-- 初始化Y坐标为3
  ; MessageBox MB_OK "2Width: $2, Height: $3"
  OverflowLoopY:
    StrCpy $6 3   ; <-- 初始化X坐标为3
    OverflowLoopX:
        SendMessage $0 ${WM_MOUSEMOVE} 0 "$6 | $7"
        ; MessageBox MB_OK "1X: $6, Y: $7, Width $2"
        IntOp $6 $6 + 8   ; <-- 每次X坐标增加8像素
        ; MessageBox MB_OK "2X: $6, Y: $7, Width $2"
        IntCmp $6 $2 ContinueXLoop ContinueXLoop EndOverflowLoopX  ; 如果X坐标超出宽度,结束X方向的循环

        ; MessageBox MB_OK "After X comparison. Value of $6: $6"
        Sleep 100 ; 给一些时间让菜单展开

        ; 减少 X 方向的循环计数
        IntOp $8 $8 - 1
        IntCmp $8 0 EndOverflowLoopX  ; 如果计数为0,结束X方向的循环

    ContinueXLoop:
        Goto OverflowLoopX

    EndOverflowLoopX:
        StrCpy $8 20   ; 重新初始化X方向的最大循环次数

        IntOp $7 $7 + 8   ; <-- 每次Y坐标增加8像素
        IntCmp $7 $3 ContinueYLoop ContinueYLoop EndOverflowLoopY  ; 如果Y坐标超出高度,结束Y方向的循环
        ; MessageBox MB_OK "After Y comparison. Value of $7: $7"

        ; 减少 Y 方向的循环计数
        IntOp $9 $9 - 1
        IntCmp $9 0 EndOverflowLoopY  ; 如果计数为0,结束Y方向的循环

    ContinueYLoop:
        Goto OverflowLoopY

  EndOverflowLoopY:
  ; 隐藏NotifyIconOverflowWindow
  FindWindow $0 "NotifyIconOverflowWindow" ""
  System::Call 'USER32::IsWindowVisible(i) i ($0) .r0'
  IntCmp $0 0 0 makeHidden
  makeHidden:
      ; SW_HIDE 的值为 0,它隐藏窗口并激活其他窗口。
      System::Call 'USER32::ShowWindow(i, i) i ($0, 0)'
!macroend

!macro customInstallMode
  # set $isForceMachineInstall or $isForceCurrentInstall
  # to enforce one or the other modes.
!macroend

!macro customWelcomePage
  # Welcome Page is not added by default for installer.
  !insertMacro MUI_PAGE_WELCOME
!macroend- 在你的 electron builder 配置文件中引入刚刚创建的 installer.nsh 脚本
js
   nsis: {
          include: path.join(__dirname, 'build', 'installer.nsh'), // 指定包含你的自定义 NSIS 脚本的文件路径
      }
重新打包就可以修复这个问题了
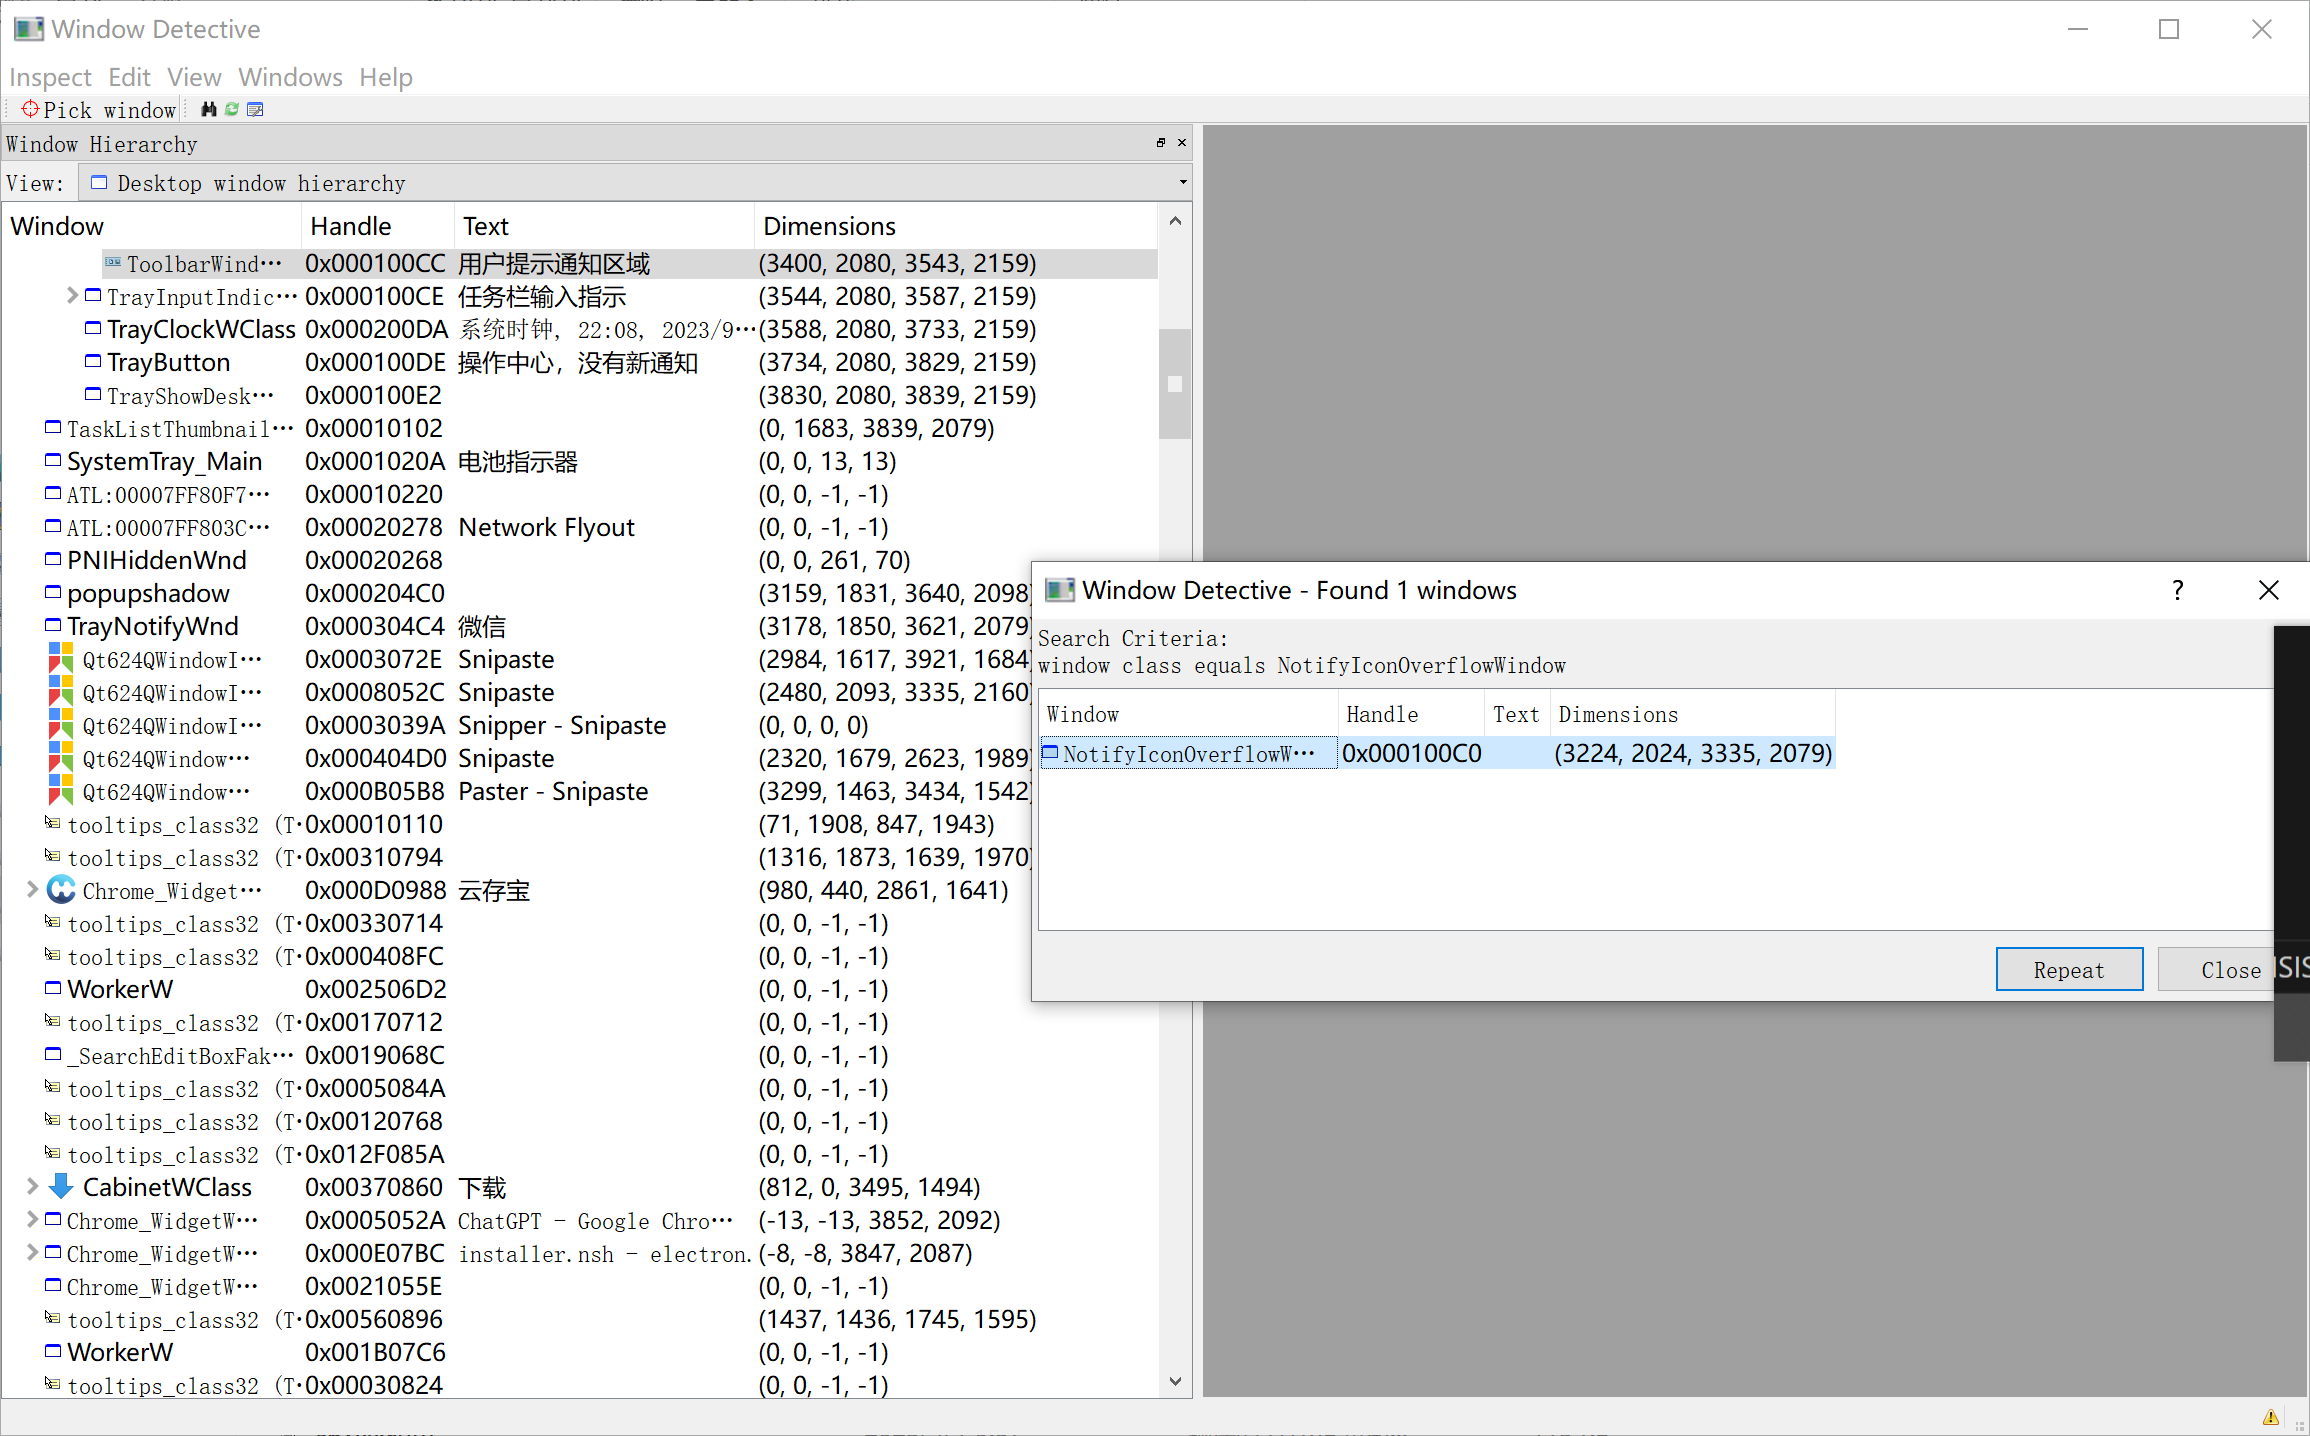
工具 1 - Window Detective - 如何查看 Windows 窗口句柄
下载地址
https://sourceforge.net/projects/windowdetective/files/
也可以点击这里下载 Window-Detective-3.5.1-setup.exe

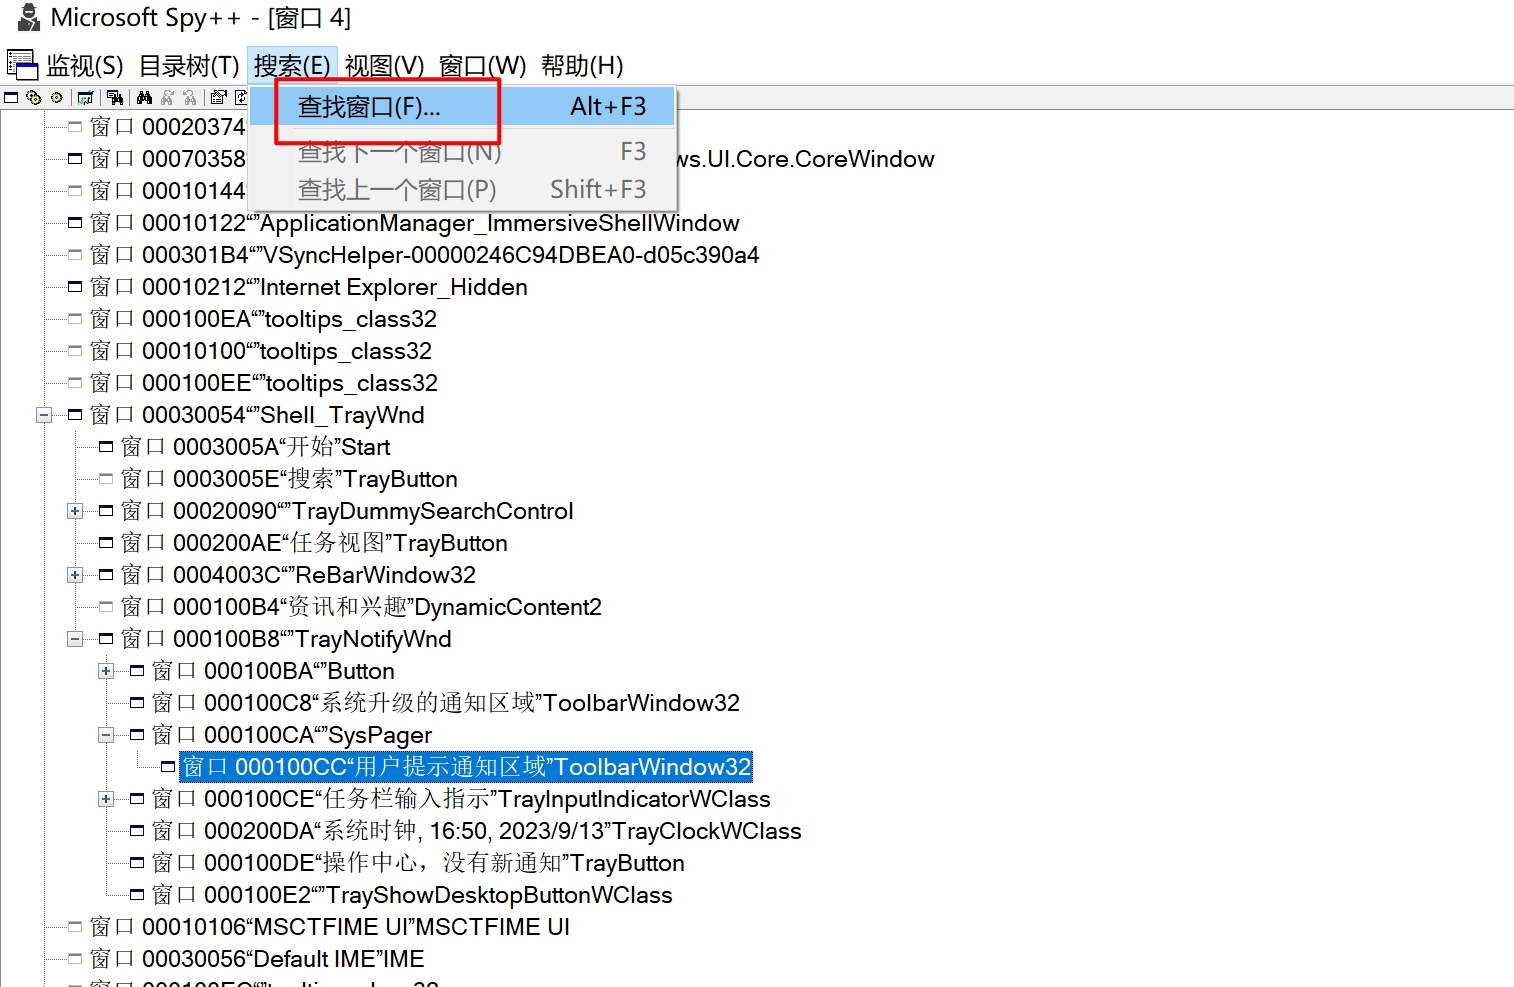
工具 2 - Spy++ - - 如何查看 Windows 窗口句柄
E:\vs2022 你的 VS 的安装目录
在这个 E:\vs2022\Common7\Tools\ 目录下面 找到 spyxx.exe文件,双击它会打开一个面板
E:\vs2022\Common7\Tools\spyxx.exe
